 |
| Photo by Life as a Healthy Mom |
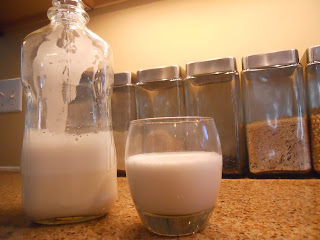
For those of you who are lactose intolerant, vegetarian, vegan, or just want a change in your daily routine, nut milks are the way to go. I tend to use it in smoothies and baked goods; and believe me, when I say that it is soooo simple to do.
I choose to make my own almond milk because:
- almonds are chock full of essential vitamins and minerals, such as magnesium, potassium, copper, vitamin E, selenium and calcium
- almonds are also high in monounsaturated fats
- store bought almond milk contains synthetic vitamins and may not contain as much fiber as the homemade comparison
- store bought almond milk also contains thickeners to make the milk more palatable
- there are no surprise ingredients....what are "natural flavors" anyway? You know what you put in it.
- it has a more delicate taste, and you can sweeten it however you choose
Here is my recipe for Almond Milk:
Makes 3 cups
1 cup raw almonds (I buy them at Trader Joes)
3 cups water, plus more for soaking
1 tsp. vanilla
1 tsp sweetener such as maple syrup or raw honey (optional)
pinch of salt
Pour the almonds in a bowl and cover it with filtered water. Let them soak in the water overnight.
 |
| Photo by Life as a Healthy Mom |
Drain off the water from the almonds. Add almond to the blender. Add 3 cups filtered water to the soaked almonds. Blend for 5 minutes. Strain mixture through a cheesecloth covered colander. You can use the back of a spoon to push as much liquid out as possible.
 |
| Photo by Life as a Healthy Mom |
Rinse the blender container, and add the newly strained almond milk back in the blender. Add a pinch of salt, vanilla, and your choice of sweetener. Blend for 1 minute.
 |
| Photo by Life as a Healthy Mom |
Label the container.
 |
| Photo by Life as a Healthy Mom |
Now........what to do with the leftover almond mush left in the cheesecloth. See my blog about almond meal.
No comments:
Post a Comment